Sunday, November 4, 2012

Pumpkin Cream Chicken Casserole

So let me just tell you how frustrated I am right now. Well I have been sick all day, puking my guts out this morning and just feeling like a truck ran over me the rest of the day. Yea it is no fun, I don't know anyone that actually enjoys being sick. Well in the midst of being miserable I decided to write a blog post since my ass was not moving off the couch today. So I wrote a fantastic one and went to save it and for some reason it did not work! So I lost it all...arrrgh! Unfortunately, there is nothing I can do about other than complain and start over. So even though I was angry, I knew that it was probably my fault anyway and I shouldn't sweat the small stuff, so here I am again writing away.

When things do not go the way you want them too, instead of getting super mad, frustrated, and take it out on other people its important to really think if its something you can even control. Their was nothing I could do once it was gone, so I moved past it fast and started typing again and learned my lesson of copying the whole blog before I post. You really do not want the little stuff to take over your life. Once I took a step back and just realized I couldn't control all situations, I was amazed by how much my life got better. So next time some one cuts you off, someone is rude to you, etc etc etc, just brush it off and know that your life is worth to much to even stress about the little things! Life is just too short.

So I found this recipe on the amazing PaleOMG site when I was looking for a casserole recipe. Casserole recipes are really tough to find 'paleo,' but I think I scored on this one. I had all the ingredients needed and you can get them easily at a local store. And of course I wanted a recipe with pumpkin! I had an almond milk pumpkin latte the other day...I think I'm in love...

RECIPE: Pumpkin Cream Cheese Casserole

INGREDIENTS:

  • 1-1.5 lbs chicken breasts, chopped into 1 inch cubes
  • 1 medium sized spaghetti squash. cooked and shredded
  • 1 head cauliflower, chopped
  • 1 can pumpkin puree
  • ½ can canned coconut milk
  • 3 garlic cloves, minced
  • ½ yellow onion, diced
  • 2 tablespoons olive oil
  • 1 teaspoon garlic powder
  • 1 teaspoon onion powder
  • ½ teaspoon cinnamon
  • ¼ teaspoon nutmeg
  • salt and pepper, to taste
Instructions
  1. Preheat your oven to 425 degrees.
  2. So first thing first, chop the cauliflower and put in a 9x11 baking dish with olive oil, salt, and pepper. Also, cut the spaghetti squash in half and place face down on a baking sheet. Throw both in the oven for around 30ish minutes. The cauliflower should get roasted and the squash should get soft. 
  3. While the squash and cauliflower are cooking, it’s time to cook up your chicken. Pull out either a LARGE saucepan or a large pot and put under medium-high heat.
  4. Add olive oil to it along with your minced garlic. Once the garlic begins to smell, add your chopped onions and cook until translucent.
  5. Then add the chopped up chicken to the onions. Cover and let steam for around 5 min.
  6. After the chicken is almost done (you'll know!), add can of pumpkin, half can of coconut milk, and spices to the pan. Mix it all up as best you can. I had to add a little more salt. 
  7. Once your squash and cauliflower is done cooking, and chicken saucey mixture is heated up, de-thread spaghetti squash with a fork, running the fork the opposite way of the threads. Be careful because it is going to be super hot and I may have burned myself a little bit. 
  8. Add your spaghetti squash threads, and chicken saucey mixture to the 9x11 baking dish your cauliflower is in and add dish to the oven under the broiler. Cook for about 5 minutes, getting a little dark on the top.
  9. Remove from oven, but let it sit for around 10 minutes so the sauces can get all sucked up! 
  10. EAT IT!! It is really good, add any additional spices you need. I had lots of leftovers too. I overcooked the chicken a little, but it still tasted fine. I am still mastering that!
It looks gross, but my camera sucks and its good!

Tuesday, October 30, 2012

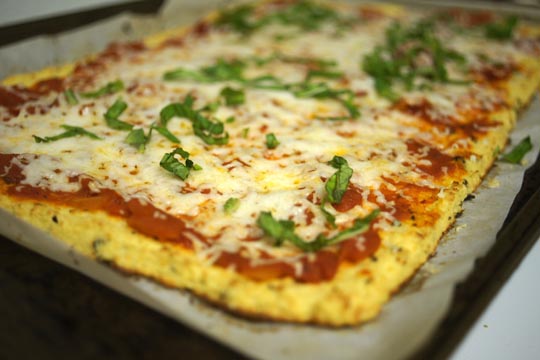
Cauliflower Pizza Crust

So I am taking a quick break on pumpkin and posting on Pizza!! Don't worry pumpkin fans, I have about four pumpkin recipes I am making this week since I am so obsessed and have three parties I am going to where I need to bring some Paleo goodness. So of course I am bringing something pumpkin. So most people when they decide to go Paleo have the biggest problem of giving up pizza. Who doesn't like bread with cheese, too bad I'm lactose in tolerant and gluten and I don't get along...damn you pizza and your tastiness. I had some friends that really love pizza and told me they never could give it up so I started searching for a crust recipe. Since usually the crust is super processed, no nutrient, gross white bread, that somehow tastes good; I had to search for alternatives. 

I have made an almond crust recipe before and it actually turned out pretty good. So I was originally looking for a new recipe with that when I came across a Cauliflower Crust Pizza. Hmm, sounds gross, but it got great reviews.....so why not? So all the recipes I had added some sort of cheese to the recipe. I decided to omit, but I would say go for it to make it even more tasty!

RECIPE: http://detoxinista.com/2012/01/the-secret-to-perfect-cauliflower-pizza-crust/

INGREDIENTS:

4 Cups Raw Cauliflower Rice
1 Egg, Beaten
1/3 cup soft goat cheese or parmesan or mozzarella 
1 teaspoon dried oregano
Pinch of Salt

So go ahead and preheat your oven to 400 degrees. Start by making the Cauliflower into rice. I just put it in my food processor until it was rice consistency. After done with that it is time to cook the rice! Put about an inch of water in a pot and bring it to a boil. Add the 'rice' and let it cook for about 4-5 minutes.  Now the most important parts!!! Strain the rice after its done then transfer to a dish towel and squeeze all the water out. Check out the website above, they have great pictures! 

Next, mix the rice, egg, cheese, oregano and salt. After it is mixed really well together (and won't seem like its going to work at all) it is time to form it into a pizza crust. Press the dough on a baking sheet lined with parchment paper making the edges a little higher and the dough itself around 1/3" thick. 


Bake for 35-40 minutes at the 400F. The crust should be firm and golden brown when done. Now just add any toppings that you would like!! I did spinach, mushrooms, grilled chicken, and whatever else I could find in the fridge. Then throw that back in the oven for 5-10 minutes. EAT IT, because it is a tasty alternative to regular pizza. I even had some for leftovers for a few days. I feel like a little more experimenting with the crust will be good since its hard to actually have a slice, you more have to eat it with a fork and knife, but I still enjoyed it. You can't even tell the crust is actually made with cauliflower.


Of course regular pizza just is amazing, but knowing the way it makes me feel and all the ridiculous ingredients in it I can't pronounce or know what they are, I'll take this crust! Enjoy :-)

Thursday, October 18, 2012

Pumpkin Granola

Fall in Colorado=amazing
So fall is here!! Which means all I do is eat stuff with pumpkin and wear boots. Ok I lied, I do more than just that, but those two things are my favorite. For the last week I have been visiting Chicago, spending time with my family and friends. For those that don't know, I grew up here, so it's nice to come home from time to time, but I am already missing Colorado. One of the reasons I came home was to teach my parents the Paleo diet and visit CrossFit gyms! I just love meeting people and one of the gyms I was looking forward to visiting  was CrossFit Posted! I met the guys that were going to open the gym at the CrossFit games in June. They had not opened it yet, but talked about it and the gym just happened to be right by my parents house. What are the chances! They have been open now for about two months and getting new members each day. If you live around Brookfield, IL you HAVE to check it out. Jason, Matt, and Mike are great guys that will share their passion of CrossFit with you. Thanks for letting me WOD and I am SO close to getting a muscle up, thanks to them. :-) I also got to talk nutrition with a lot of people, which is another one of my passion since education is the most important part of it. I also got to visit Windy City CrossFit, (in Lakeview downtown) where my friend Megan goes. Great gym and amazing good looking people. Super nice to me and loved the WOD even though it involved running.  CrossFit just has an amazing community and I love meeting more people that share the same obsessions of me each time I travel to a different place :-). 


So with the fall here, I am now obsessed with pumpkin. I looked online to see what I could find and immediately was drawn to Juli Bauer's pumpkin granola recipe. I need something I could eat while I went hiking and for a snack around the house. The fact that it has pumpkin in it was a super added bonus. The ingredients were not hard to find at all as I got them all from whole foods for a reasonable price. 

RECIPE: PUMPKIN GRANOLA

INGREDIENTS:

  • 1/2 cup sliced almonds
  • 1/2 cup pumpkin seeds (pepitas)
  • 1/2 cup pecans, chopped
  • 8-10 dried dates, pits removed, then chopped
  • 1/2 cup pumpkin puree
  • 1/3 cup coconut oil, melted
  • 1/3 cup unsweetened shredded coconut
  • 1/3 cup maple syrup (I used honey)
  • 1 teaspoon vanilla extract
  • 2 tablespoons cinnamon
  • 1 tablespoon nutmeg
  • 1/8 teaspoon ground cloves
  • 1/8 teaspoon ground ginger
  • pinch of salt

Preheat your oven to 325 degrees. Then in a bowl add your pumpkin puree, coconut oil, maple syrup(or honey), vanilla, and all spices. Then add all the nuts, seeds, coconut, and dates to the mixture until its all mixed and looks and smells like amazing. Spread it over a oiled up parchment paper and throw in the oven for around 30-35min. I mixed it around after about 15 minutes and kept my eye on it. It is really easy to burn, but just wait until it looks brown and crispy. Should be around 30-35 minutes. Take it out and LET IT COOL! Its important so it can stick together and harden up. The spices and combination of everything else is just amazing. I ate some by itself and some with a little coconut milk. It was fantastic and it lasts forever. I stored it in an airtight container in my fridge and had it for at least a week. 

Enjoy! I ate it all so fast that I didn't take any pictures. Way to go Stef, now people aren't even going to believe you made it. Well I did and you'll be happy when you make it and eat it. Just send me a picture and I'll put it on the blog :-). Until then I'll just use Juli's since mine looked exactly the same....believe me. 


Monday, October 8, 2012

Avocado Stuffed Burger

Haha So true...pick your battles
Holy Moly!! It has been way to long since I have posted and I have cooked so many yummy meals. So I thought it is about the time to get back at it and share everything that I have made. Paleo is such a funny word. I find myself hesitating before saying it a lot of times. I think this is because people associate Paleo with CrossFit, not eating the things they want, and judgement. So now when I talk to people about nutrition I talk about eating real food. Paleo is all about eating real food and learning why you should eat it, you really do not even have to put a name to it. It is funny how I mention Paleo to people and they are immediately against it, bash it, make a million excuses why they cannot do it, and don't listen anymore. Though if I talk about eating real foods and how grains, soy, legumes, sugar, etc are not good for them, they seem to listen. I wish people wouldn't judge that much until they try it. I am also one of those nutritionist that would never push it on anyone! I will educate you and show you the way and then it is up to you whether you decide to believe in it or not. I'm hear to help, inspire, and get you healthy, I'm hear for YOU, not me.

A great example are my brother and dad. They always made fun of me and the way I ate. Saying I was so high maintenance and should just eat. Well I look at food at a different way then them and they just did not understand. All of a sudden though they saw the improvements that I was making with myself and changes in my body and new that something must be going right and CAME to me! They now both have respectively lost 10-15 pounds. I am proud and can not wait to teach them more recipes and help them understand why I love this type of eating.

Alright enough with the paleo crap talk, right?? If you are reading this blog you probably already eat Paleo, but whatevs, I'm sure you can relate! So awhile back I had some grass-fed burgers and avocado. Sounded super boring to me...until I found this recipe by George over at Civilized Caveman Cooking Creations that combined the two! Genius!!

This is what they are supposed to look like!
RECIPE:  AVOCADO STUFFED BURGERS

INGREDIENTS: 

  • 2 Lbs GrassFed (IMPORTANT!!!) Ground Beef 
  • 2 Avocados
  • 1 Cup Sun dried tomatoes, chopped NO OIL
  • Juice of 1/2 Lemon
  • Zest of 1 Lemon
  • 2 Tbsp Black Pepper
  • 2 Tbsp Sea Salt
  • Bacon Fat (Optional)
Super easy ingredients, I had all of these (even the sun dried tomatoes) in my kitchen. I don't really like sun-dried tomatoes so not sure why I had them. I put like 1/3 cup in...did I mention I don't really like them? 

1. So fire up that grill! You could sauté them too, but I love the grill, I cook everything on it. 
2. First, smash up the ground beef with the 1 Tbsp sea salt and black pepper, and zest of 1 lemon. 
3. In a separate bowl smash up the avocados with rest of sea salt, black pepper, sun-dried tomatoes, and lemon juice. BAM. I added some cilantro...I LOVE CILANTRO. 
4. Ok so here is the trick, making two thin, small burgers that you can stack to make one burger that hopefully isn't bigger than your head. I definitely struggle at this, I couldn't get it to stay together the thinner I made it. I finally someone figured it out for the most part. 
5. On one burger top it will the avocado mixture and then take another burger and put it on top and pinch the edges. I had a really hard time getting the avocado mixture not to spill out. Just keep playing around with it until all burgers are 'stuffed'
6. Go ahead and throw those suckers on the grill, around 6-8 minutes a side and drizzle some bacon fat on there if you have...amazing.
7. After they are done, let them rest for about 10 minutes and dig in. There wasn't nearly enough avocado inside it so I topped them with the rest of the mix I didn't use. 

This is what mine looked like...not as good as his, but still tasty
Super tasty and super easy. Two qualities I love in recipes. I paired these with a sweet potato chips and sautéed some spinach! 

Excited to be back making yummy recipes or not so yummy recipes...but haven't ran into one of those yet :-). 


Thursday, May 17, 2012

Crockpot Sweet Potato Casserole

Do you ever have one of those days where you just are unmotivated and really don't want to do anything? Well I had one the other day and now I am on a quest to make sure that does not happen again. CrossFit is super humbling, but really hard when you have been great at a sport your whole life and catch on to things super fast, but CrossFit is different. I played hockey in college, it came easy, it is what I was really good at and accomplished so much in my fours years in college. I'm used to having that mentality of being the best, and well at CrossFit I'm far from it. So seeing people surpass me who have been doing Crossfit for a few months is so frustrating I go through phases where I want to quit. I'm not a quitter though, and I'm deteremined to get better. It took me awhile, but I know look at CrossFit as an individual sport. Its me v. me. I read this ARTICLE about things you need to give up to be happy. It is so true. Please read it. I feel if more people do not sweat the small stuff and realize how little things  are not important. This article spoke to me especially in a CrossFit sense and I'm back at it, just trying to get better each day, for me. 


Enough of the sappy Crossfit stuff, on with the recipe. So I found this recipe as I was trolling Facebook and found an amazing website called Paleo Pot! Pot as in Crockpot druggies! Drugs are bad :-)!  It is a website dedicated all to Paleo Recipes you can do in the Crockpot. The Crockpot is a wonderful tool and being able to make a good amount of food and with minimal work is super appealing to me. So you better believe you will see more recipes from here. I need to get a bigger crockpot though since mine is a tad to small. 


INGREDIENTS:
2 pounds lean grass-fed beef (if possible)
1/2 pound uncured bacon
8 eggs
3 large sweet potatoes
1 large white onion
1 large red onion
Spices: Cayenne, Salt, Pepper, Paprika, Garlic, Oregano

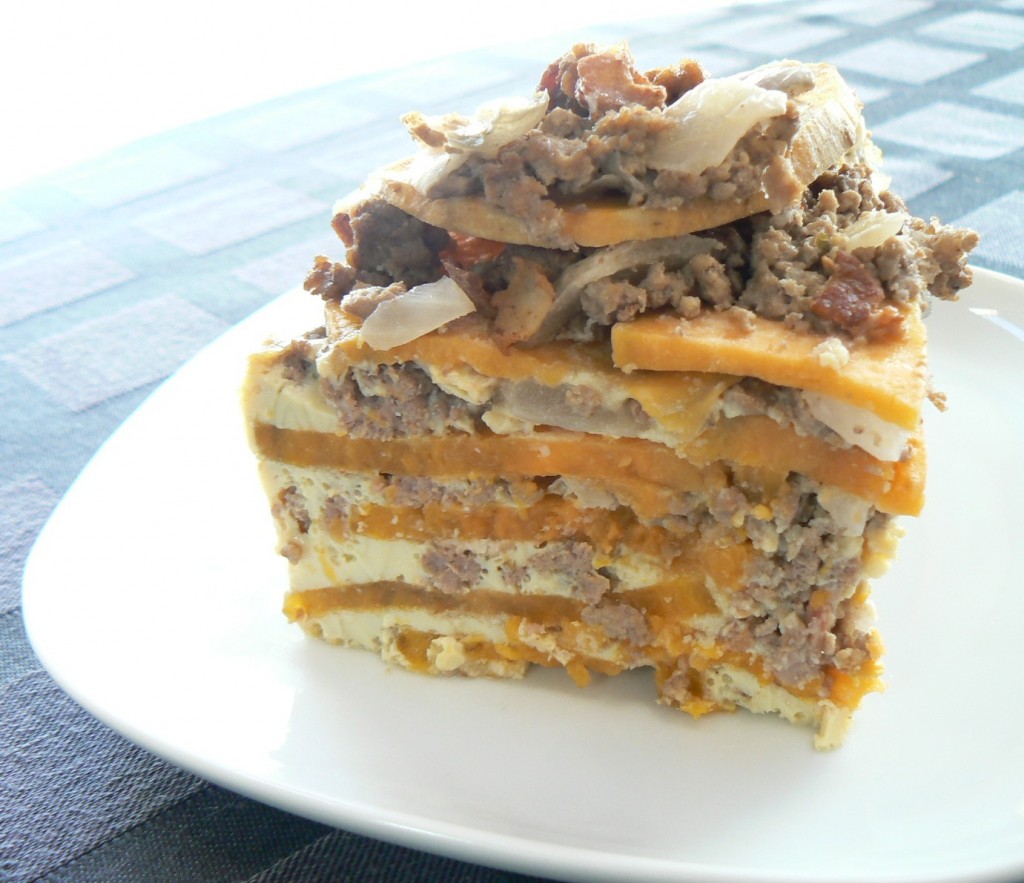
I have a small crockpot, so I split everything in half, but if you have a medium to large one, go with the amounts above. I had all these ingredients already too so I was excited to get'er done. First I diced the bacon and cooked it up, put it to the side so I could cook the rest. I sautéed the onions next in the grease until they got translucent and then added the meat and all the spices I wanted to. I also added some kale since I wanted some greens in there and I had it in the fridge. I also started to cut the sweet potato. If you have a mandolin, use it!! It took me 15 seconds to get all the sweet potato slices I needed. I got one from amazon.com and it cost 10 dollars, I would invest in one for sure so you have the same size slices. After the meat was browned and ready to go I started my layering.  First the sweet potatoes, some meat, some bacon, first layer down, then I just repeated until I ran out of food. It got pretty high and looked yummy. Once I finished my layers I whisked the eggs and just poured it all over the layers in the crockpot. I set the crockpot to low for 6 hours and went out for the day!
How its supposed to look....


The recipe says after the 6 hours to put the mixture in the fridge over night to let it all come together. I was excited to be able to have it for breakfast in the morning. Sure enough it was all put together in the morning. I added a little bit of salt and popped it in the microwave to heat it up. It doesn't look good since I wasn't great about the pictures, but it tasted yummy. The sweet potatoes are soft and the crunch of the bacon is fantastic. The flavors all come together. The tricky part is getting it out of the crockpot with out it falling apart! Super easy, great for leftovers, and something you can have for any meal of the day! Enjoy...and I sweat it taste better than my pictures look....darn phone camera!


Yea I'm not great at pics.


Monday, May 14, 2012

Banana Bread French Toast

It has been a crazy couple of weeks! I haven't been trying new recipes at all and I have been eating out a little too much. I cooked so much for Regionals, I needed a break and cooked a lot of my staple recipes that are already on the blog. Regionals was a blast! I am happy that it is over since it was so time consuming, but all the hard work that our team put in was shown at the CrossFit regionals. Our team ended up in twelve place out of 30 teams. The best workout was WOD #4 where Soco took first in their heat and they had all of us cheering them on and screaming SOCO! The team had a lot of ups and downs, but worked through everything to give it their all. I'm so inspired by everyone on the team and how much hard work they put in and for never giving up, GO SOCO!


Non-Paleo french toast...nom nom
So I have wanted to make this recipe for a long time. I LOVE French Toast. So much that I almost went and bought bread (ahh!) and made it the the day. Though whenever I crave non-paleo foods, I wait a few days and see if I'm still craving it. If I am, then I devour it and I'm ok with that! I have been looking for a paleo french toast recipe and found this one! So I have been eyeing this recipe for awhile and finally had some time to make it. I got it from the great site of Paleomg where the genuis paleo cooker Juli Bauer made up this one. I couldn't wait to try it!

RECIPE: http://paleomg.com/banana-bread-french-toast/

INGREDIENTS:
  For the bread:

    • 3 medium spotty bananas
    • 1.5 cups unsalted cashews- Used 1 cup almond butter
    • 2 tablespoons walnut oil -Didn't use
    • 1 cup almond flour
    • 2 eggs, whisked
    • 1 TBSP Raw honey
    • 1 tsp baking soda
    • 1 tsp baking powder
    • 1 tsp vanilla extract
    • 1/2 teaspoon cinnamon
    • pinch of salt
  For the French Toast:
    • 2 eggs
    • 1/3 cup canned coconut milk
    • 1/4 teaspoon cinnamon
    • 1-2 tbsp coconut oil
Preheat the oven to 375 degrees. I mixed the bananas and almond butter in my Vitamix or if you have a food processor that would work well too until its smooth. After that is done add it to the 2 whisked eggs and mix it up. Then add the rest of your ingredients. Simple! I had a bread pan that was just a typical one, not sure the sizes, but I had a tin foil one I bought from the grocery store. Make sure you oil the heck out of the pan though so the bread can easily slid out. 

After baking for about 28 minutes, the top was very crusty and I took it out for it to cool! That is the hardest part since I love Banana Bread and it smelled so great. I let it cool for about 10 minutes for I let it out of the pan. The bread itself fell quite a bit and I think that is because I used a little too much almond butter, I would decrease it a little bit next time. Don't get me wrong, it still was amazing! After eating a piece of the banana bread, I was excited to make it into french toast. The bread stayed together well and was hearty enough to make a good French Toast. 

I cut a few larger pieces and dipped it into all my french toast ingredients minus the coconut oil and placed in a pan to cook! Yum Yum. They came out nice and crispy. Pure yuminess. I topped it with a few banana slices and had a little agave nectar and grass-fed butter. I had two slices and was full. The bread is dense compare to other french toast breads, but the banana and the almond butter together taste fantastic. I had no idea you could use these ingredients to make such a tasty bread. I saved the rest of the bread for later and finished in a few days since the bread itself is great. 

So even if you don't want to make it into french toast you have a great banana bread. Next time I want to add some chocolate chips. 


Wednesday, May 2, 2012

CrossFit Games Regional Prep


The weekend is coming and you know what that means? No probably not, but I'll fill you in...Crossfit Games Regionals?!?!?! OMG OMG. So for the few of you that have no idea what I'm talking about it is a huge competition that is going on in Castle Rock, CO where teams and individuals from the Southwest region compete for a chance to go to the Crossfit Games in California! I mean this is the creme de la creme! I am so excited for this event because I get to volunteer the whole weekend and immerse myself into the CrossFit community, not to mention meeting awesome CrossFit people. And the best part you ask? CrossFit Soco is sending a team to compete!! I can not wait to lose my voice from screaming and live vicariously through all the athletes. Sean is on the team and I think I might be more excited than he is. If anyone is in the area and wants to check out this "CrossFit" thing since all you do is here me talk about it 24/7, then you should  for sure check this out. 
We are so lucky to be able to host the Regionals in Colorado and you should take advantage of being able to watch some amazing athletes! 

So I'll be volunteering the whole weekend and Sean will be competing so the first thing that comes to my mind is food. I'll be lucky enough to have catered food from the amazing Paleo Wagon while I'm volunteering so I'm good there, but Sean will need lots of food all the time..oh vay! So we decided to start planning out a menu that will be easy, but good so Sean can power through the workouts and stay energized.

So here is what I'm packing up for the weekend!

1. Sweet Potatoes- I am going to make chips and mash! For the chips I'm just going to cut the sweet potatoes in even circle 'chips' and bake for 10-15min at 350. For the mash I bake the sweet potatoes for about 35 minutes. I then through them all in a bowl and mash!! I usually always add full-fat coconut milk so there is some fat and carbs. Then you can get creative. I like adding things like cinnamon, grass-fed butter, chives, and anything else that might be paleo I can put in a potato! 

2. Avocados- Great fat that is easy to cut open and eat with anything else. Might make some guacamole to put on cucumbers, carrots, etc. 
3. Coconut Water- Great potassium. I think this stuff is gross, Sean loves it. 

4. Bison- I'm making a bison crockpot stew that will be good cold, but easy to make and easy to pack away and put in a cooler for a nice meal after a WOD or a snack in between. I'm honestly just throwing whatever I have in crockpot. I love crockpots.

5. Coconut/Almond Butter- Another great fat source that actually tastes really good by itself

6. Some fruits- Some oranges, bananas, and apples for a quick carb snack if needed

7. Protein Shake- Gotta have some recovery protein for right after the WOD

8. Veggies- Some quick go to veggies like cucumbers, carrots, and celery. Can dip in guac or almond butter.

9. Bacon- Obvious reasons, its awesome. 

10. LOTS of Water

11. Nuts- Probably some Macadamia and Almonds

I know I'm probably missing a few things, but so far this is what we have. It takes a lot of planning, but so worth it in the long run. The way you fuel yourself is so important especially when you are competing. Since I got rid of all processed and refined foods and have focused more on a 'paleo' diet, my energy has increase, my fitness level has gone way up, I feel great, and I have leaned out without even trying. 

I'll be volunteering all weekend long so say hi if you see me, I'll probably be stuffing my face with Paleo Wagon goodness! Good luck to all the teams and individuals, I'll be cheering you on! And right when you think you can't....just know that you CAN!!